I largely gravitate toward facilitating digital arts due to my background in interactive media studies. I love using Adobe products such as Illustrator and Photoshop to create graphics and edit photographs. I also love making movies with IMovie, and using 3D design programs like Maya, and Zbrush. Many of these may seem impossible to facilitate with younger students, but the basic concepts behind these programs can be introduced through simpler programs, or even using a non-digital approach. You shouldn't be intimidated by technology and neither should your students!
Scratch
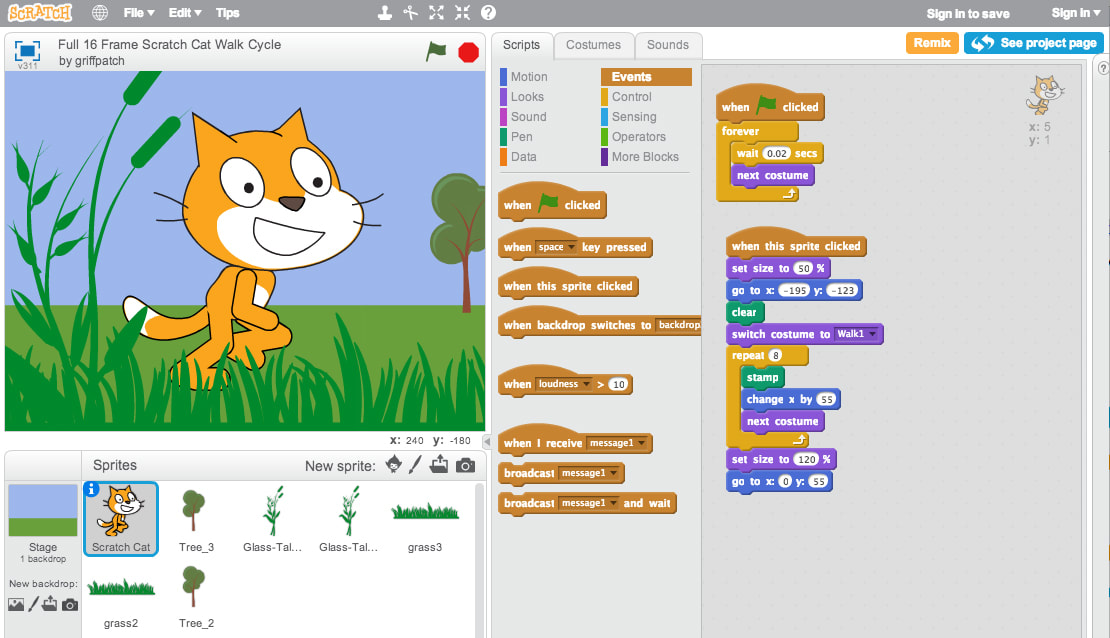
Scratch is a coding program for kids. The first thing to know when understanding scratch is the interface. On the left, you see a screen with a character pictured. This box will show the results of your code. You can use different characters, or "sprites," as well as environment backdrops, or "stages," and props to create an animation or game. In the middle there are scripts, costume and sound tabs. The scripts are the building blocks to your code. Each block is a command that programs any sprite or prop. Each sprite or prop has its own code, which can be found by clicking on the icons in the lower left box. These blocks can be dragged and dropped in the gray space to the right, where you can connect them to make consecutive code commands.
In the Motion blocks, you will find commands like "move," "turn," "point," and "go to these x and y coordinates." These will help your sprite move about the space. Look blocks can change costumes for your character, or have it speak. The sound blocks let you create and alter sound effects. The Pen tool is an aesthetic item that leaves a trail of "ink" behind a sprite as it moves. Data blocks are used for making games. Variable data blocks set certain variables to certain values. Lists hold many variables at once. I would suggest looking into tutorials using data blocks if you're interested in making games! The Event blocks are the most important. These are the headers of your blocks and they kickstart your code. Control blocks are very important as well. They allow the code to work in real time by making it wait, repeat, stop, or go on only in certain circumstances. If your characters are animated at lightning speed, you may need control blocks within it. These blocks can also be overarching, like in the example above. The sensing blocks allow characters to react based on color and distance. Operators go inside of other blocks to change circumstances. Lastly, "More Blocks," are for external operating use. It is important to pay close attention to how the blocks are formed. Some blocks can be placed inside or around others.
The best way to learn this program is to experiment! Tutorials are available for certain issues that you will come across when trying to create an animation. If you are trying to make two characters interact, you will need to either time the code perfectly or use sensing blocks. Have fun!
Makey Makey
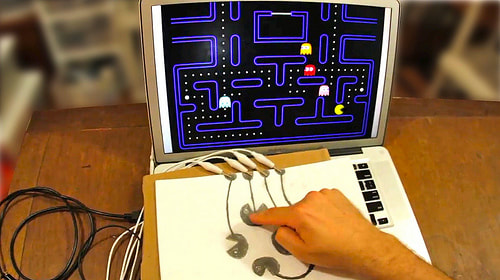 | 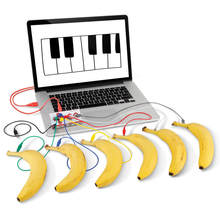 |
| Makey Makey is an invention kit that turns everyday objects into a touchpad, in combination with a computer. The kit includes the circuit board, or "Makey Makey," alligator clips, and USB cables. You must use a Makey Makey online application such as the above Packman game or piano keyboard. There are many applications that can easily be found through Google. The USB cable is connected from your computer to the Makey Makey board. | 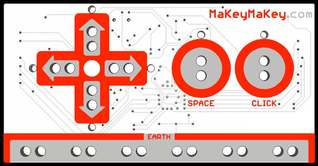 |
The alligator clips are then connected from the board to different objects that conduct electricity. These objects will be touched to interact with the computer. However, this circuit board still requires a closed circuit to do so. Another alligator clip should be connected to the ground or "earth." Once the learner holds the "earth" alligator clip and touches the object, a closed circuit is made and a signal is sent to the computer. For example, using the Packman game, if you attached an alligator clip to the UP arrow on the circuit board with the other end connected to a banana, this becomes your button. If you press the banana by itself, nothing will happen in your application. By connecting a second alligator clip to the "earth," you have created an open circuit. Close the circuit by holding the "earth" alligator clip and pressing on the banana; this will signal your Packman to travel up. By adding more alligator clips onto your circuit board, you have more buttons. In this way you can play the piano (as seen in the above picture) or even create your own cardboard game controller with nails as buttons.
Laser cutter
| Laser cutters are a relatively new technology for schools and other educational institutions. They are used for cutting various materials with a laser, which results in very precise measurements. The maker must first design a file that tells the laser cutter how to cut. Files are either in vector form, or raster form. Vector files tell the laser cutter to create an incision in the material. The arm of the laser cutter would be seen making lines as if it were drawing it. On the other hand, a raster image would tell the laser cutter to burn the image into the wood (as the maze is on the right). The laser cutter arm would be shifting back and forth, similar to the action of a printer. Raster images are created in computer programs using pixels. Vector images use vectors, which are infinite lines. They do not get blurry if zoomed in, as opposed to raster images, which get pixelated. Use this great resource to get started: http://www.instructables.com/id/How-to-Use-a-Laser-Cutter/ | 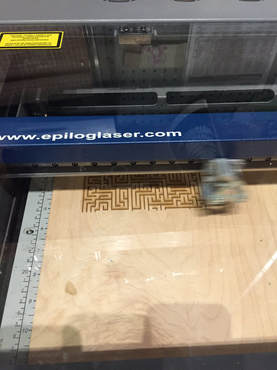 |
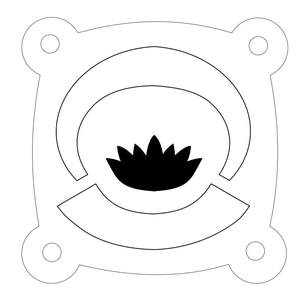
Laser cutters are somewhat complicated to set up and they may run into technical difficulties when communicating with a computer. It is important to gain information and advice from the person installing it, and to dedicate a computer that will be used to laser cut. This computer should have a design software such as CorelDRAW or Adobe Illustrator. A learner may use an easier application such as Inkscape, but this may need to be opened up in either of these applications when cutting. The design on the left was created in Inkscape by using vector lines and a raster shape. The raster shape was taken from the internet. The vector lines were created by using shapes the program already had, such as circles and ovals. The shapes were altered by editing the path segments or endpoints; each shape has various points within it that can be moved or bent. Another way to create vectors is by using the pen tool in these applications. This allows you to mark spots on the canvas. As this happens, a continuous line forms. These can also be moved or bent. See for more information about drawing vectors (http://www.wikihow.com/Create-Vectors-in-Adobe-Illustrator).
 |  |
| Every laser cutter is different so be sure to read your manual to know exactly how to use it. To send your design to the printer, simply click File, Print. Then click properties to see a menu with many settings for either a vector image, raster image, or combined image. You will need to set your speed and power intervals. This is dependent on the material and type of image. Use this to know about material settings: (http://www.engraversnetwork.com/files/MVX_Laser_Settings-Guide.pdf). Make sure the laser is calibrated to an accurate starting position. You must do this by setting the X and Y coordinates. Turn X and Y off, then move the arms to the correct position and "Set Home." Once your home is set, you can click Print and the job will be sent to the printer. Then just click Go! Laser cutters are very dangerous and therefore should be used with care. Lasers can damage objects as well as eyeballs so be careful! Use an exhaust system if able. |  |
tinkercad
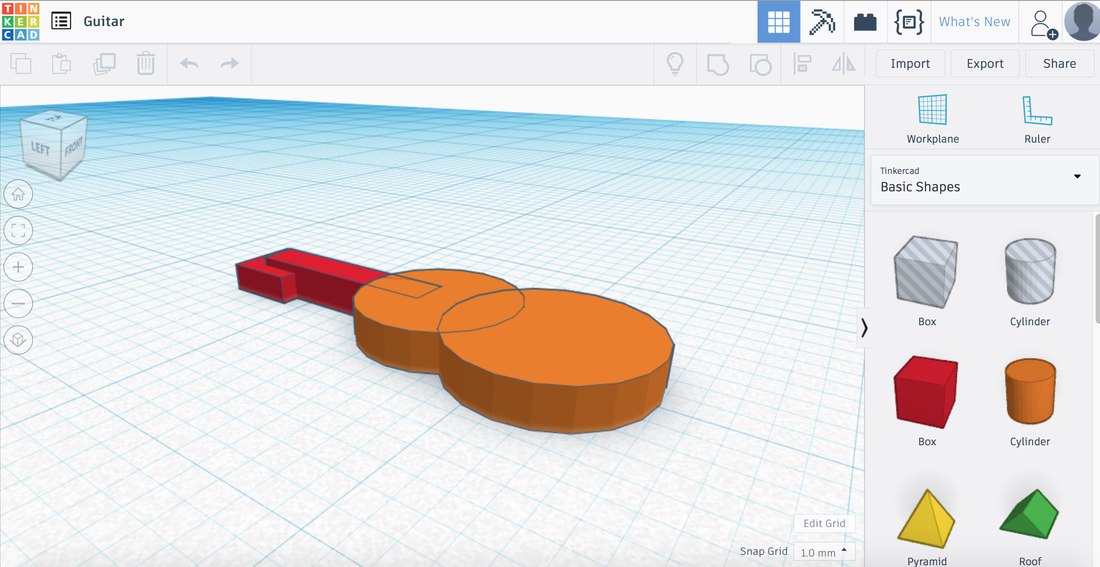 |  |
Tinkered is a great way for kids to begin 3D modeling! It is an easy applications that uses basic 3 dimensional shapes as building blocks for you design. The program shows a 3 dimensional space as well, which could be a little tricky to get used to. You can rotate the space by rotating the cube in the upper left corner of the screen. This will show different perspectives of your object. There are drop down lists with basic shapes, text, symbols, connectors, and more to the right of the screen. You can drag these shapes into the workspace and easily alter them by using arrows that raise, enlarge, shift or rotate the object. You can also create your own shapes in this program by editing existing ones. You can combine preexisting shapes or custom shapes to create objects such as a guitar! This website, https://www.tinkercad.com/, is free to use by making an account.
3d printer
3D printers are also a fairly new technology in art and education worlds. The printer uses plastic filament that melts and instantaneously hardens when printed. It reads files created in 3D modeling softwares, such as an .stl or .obj. Your 3D printer may have a built-in software that allows you to open your file and view it before printing. The printer itself must heat up before it is able to print. Printing often takes a very long time, especially if the object is larger than 2"x2." Make sure the printing surface will keep the filament from sliding. You might have to use sandpaper or hairspray on the surface to do so.
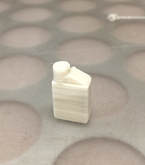 |  | 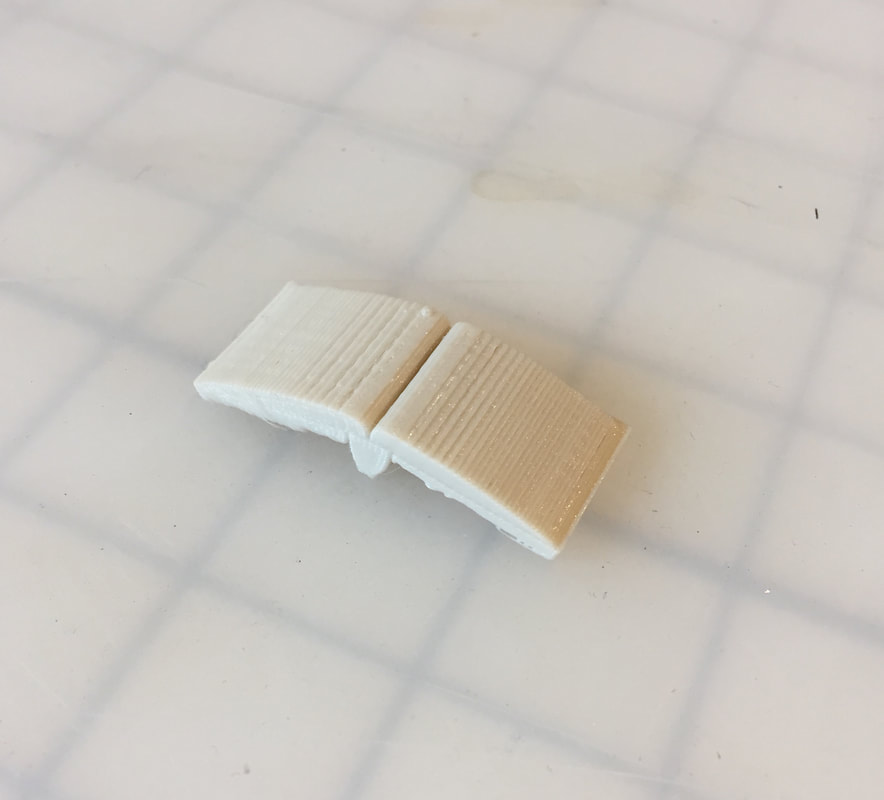 |
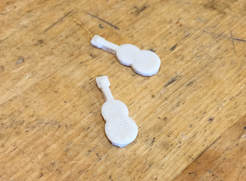
Simply create your object in Tinkercad, or a more advanced software like Sculptress, Maya, or even ZBrush. Download the file and open it in your viewing software. Proportionally shrink or expand to decrease or increase print time and scale. Print the object and watch your design come to life!
Stop motion
Stop motion animation is a great learning tool! Learners can create their own sets, characters and stories. Stop motion works in still pictures, rather than video. However, combining a series of still pictures will result in a video. You will need a device such as an IPad, as well as a stop motion animation application like "IMotion" or "Stomo." It is helpful to use a stand for your device. This could even be constructed out of cardboard. This is so that your scene never moves, only your characters.
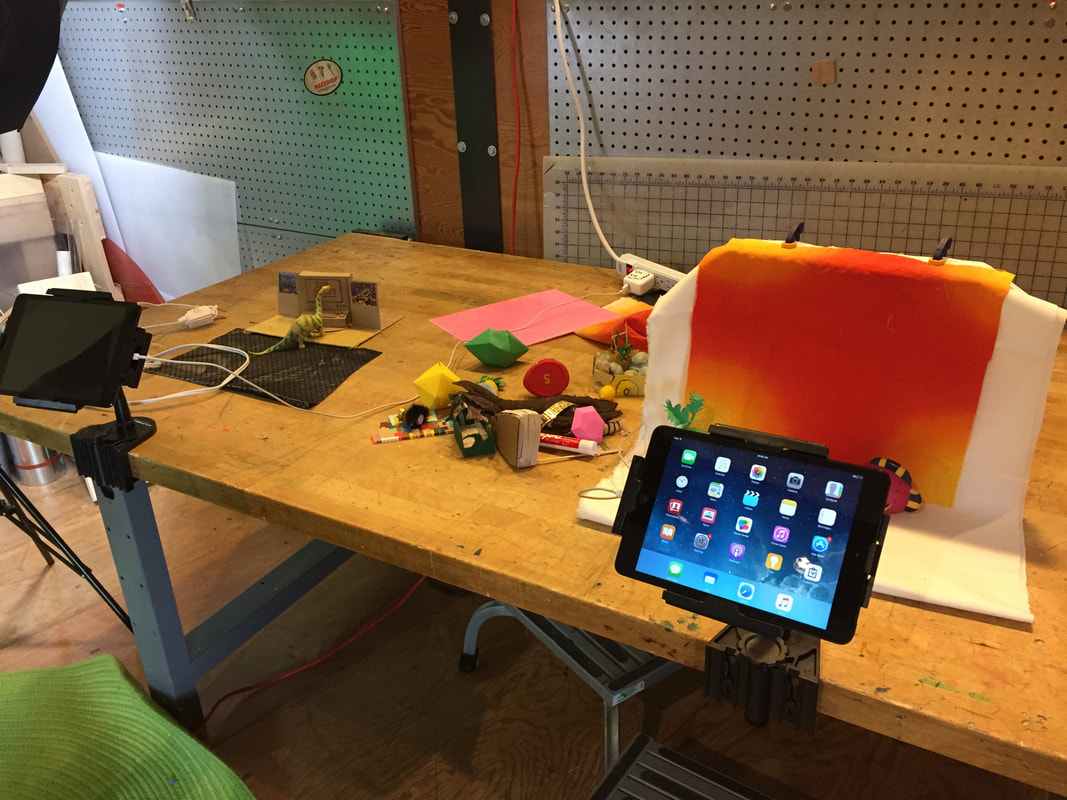 | In the IMotion app, you can create a New Movie. Then pick your approach: time-lapse, manual, removed, or mic. Use the manual button for a classic stop motion approach. Choose the frames per second. The more frames per second, the faster your pictures play and the shorter your movie. Make sure your device is set up exactly how you want the scene to appear. Preset your characters as well. To create the movie, hit the capture button (this will take a picture). Then, move characters or props up to an inch and hit capture again. It is important to move your characters only slightly each time so that your movie appears smooth and your characters gradually move, rather than jump. Continue this to create your own story. Export your movie and share! |
green screen
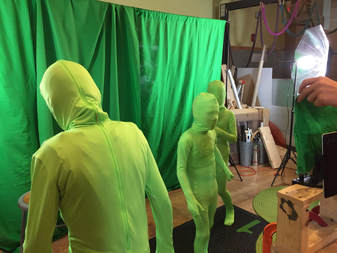
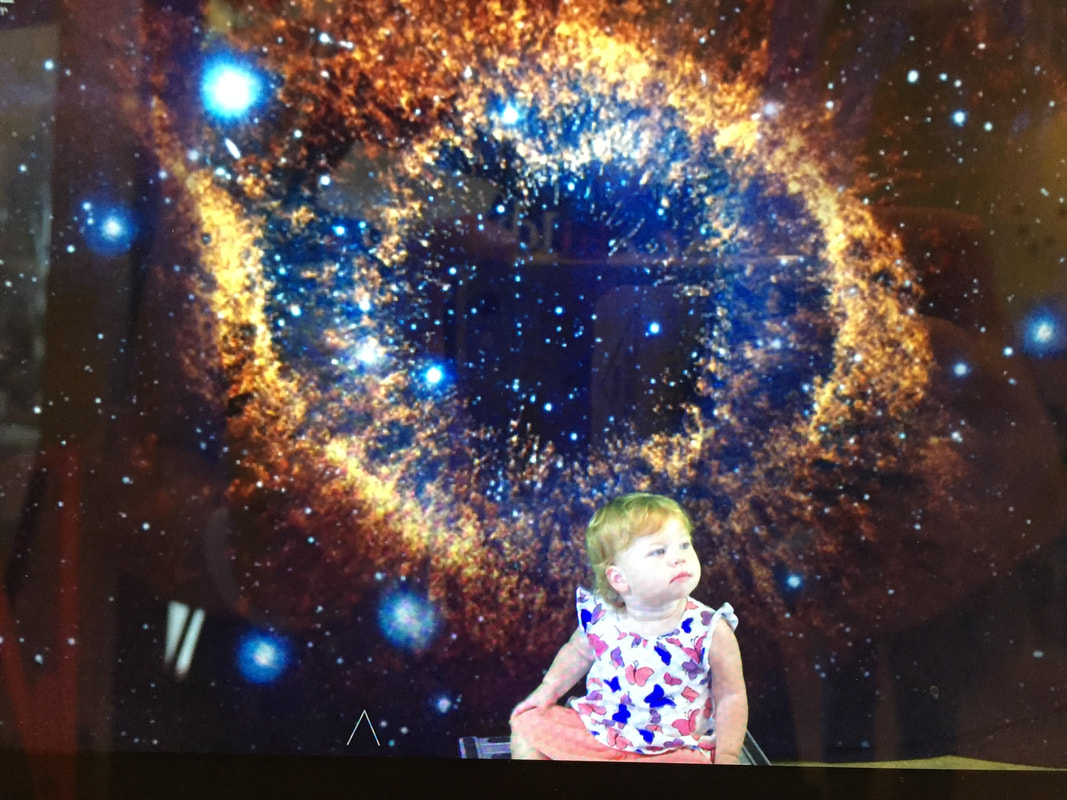
A green screen is exactly what it sounds like, a green screen. This screen can be paired with an application like Do Ink or Veescope. These applications sense your green background and replace it with a background of your choice. Backgrounds range from historical landmarks, to a moving design. You can take pictures or record video using these applications as well. Learners can become a weather broadcaster, or even create a documentary in the antarctic! Add more green fabric to your scene or a green man suit to become invisible.
 |  |  |
 RSS Feed
